A Better Way to Share Email
A lot of people share email accounts. Sometimes they’ll name them something like [email protected]. This idea seemed always seemed silly to me. If someone wants to email both you and your significant other, why can’t they just put you both on the “to” line (or “cc” one of you)? But then I became a parent and I found out the world is not so evolved. Turns out there are many many instances, especially if you have kids, where a shared address is the best solution.
A few examples:
- Our pediatrician’s office had an appointment system that could only take one email address. So any updates or reminders about our child’s visits would come to one of us and we’d have to be diligent in forwarding the info along to the other. SMH.
- Summer camps, swimming lessons, etc. Same deal, emails come only to the account holder.
- Library. We put books on hold at the library under our child’s account, and when they’re available emails come only to the account’s address. Not ideal.
So I was going to need a shared email address. The usual way people do this is to create a gmail account and share the login credentials. But then you have another account to log into and check periodically. As a techie I knew there must be a better way.
The solution I settled on was to use Cloudflare to route mail from a domain I already owned to both my wife’s gmail address and my own. Now whenever I need to sign up to something or give someone an email address that both of us should receive mail from, I use the shared email address and we both get copies on the gmail accounts we normally use.
Once you know how, it’s not complicated to set up; hopefully this can be a guide for both techies and non-techies to follow. It requires owning a domain name but is otherwise free. If you need to buy a domain name I’d recommend purchasing through cloudflare as they sell domains at cost with no markup and are generally a reputable company.
Start by going to cloudflare.com, creating an account if you don’t have one, and navigating to the domain you want to set up email routing on. I’ll run through the steps, but after it’s all set up we’re aiming for something that looks like this:
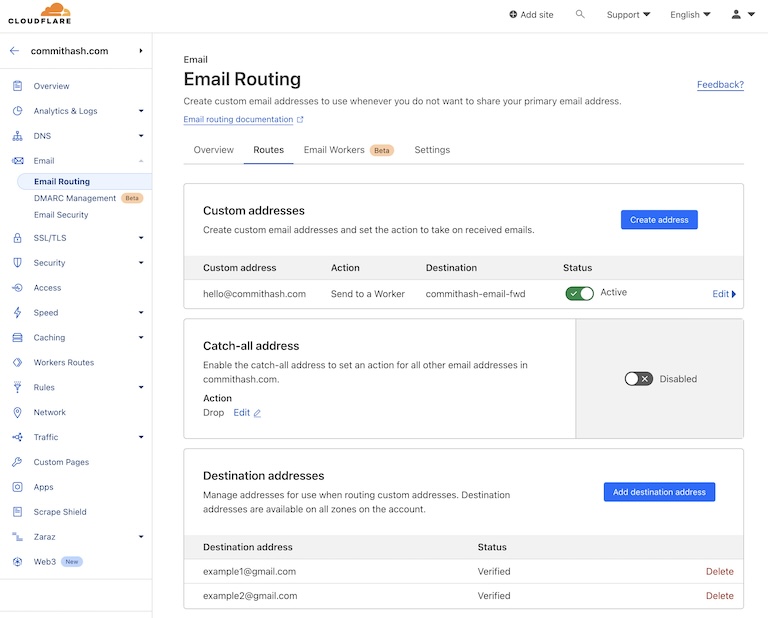
When you first visit the Email Routing page you may get a welcome page and be shown a form for setting up forwarding to an email address. This is fine if you just want to forward to a single address, but we want multiple, so you probably want to click “Skip getting started” and follow along below.
Under the Routes tab in Email Routing (shown in the bottom part of the pic above) you got your Destination Addresses. You’ll only be able to forward email to addresses you verify beforehand, so click to add your destination addresses, and when you get a verification email click on the link in it to verify.
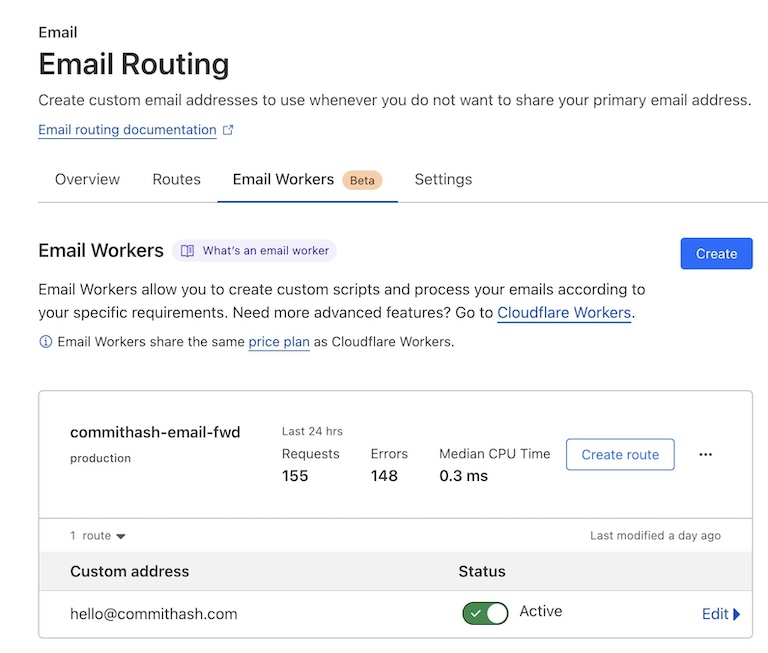
Next go to the Email Workers tab. This is what we’re aiming for there:
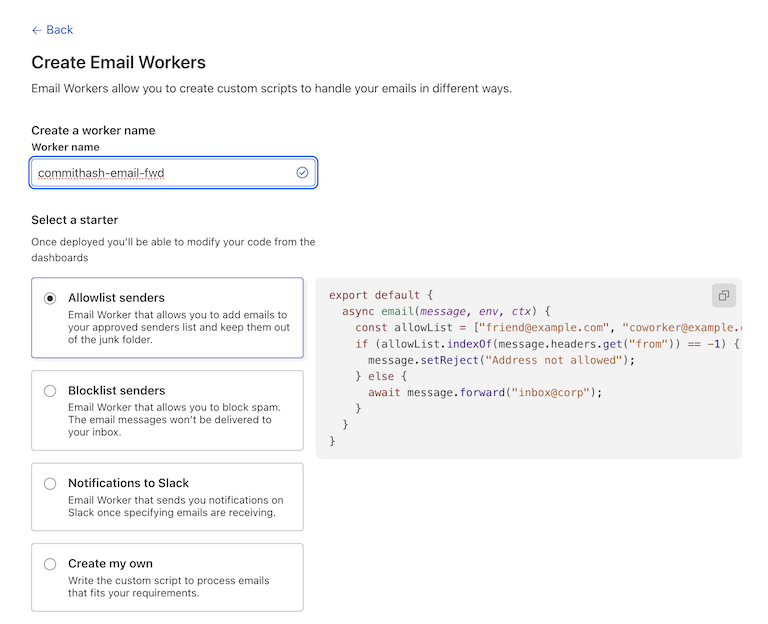
Create a new worker, name it and select the default starter template, which we’ll edit in a sec:
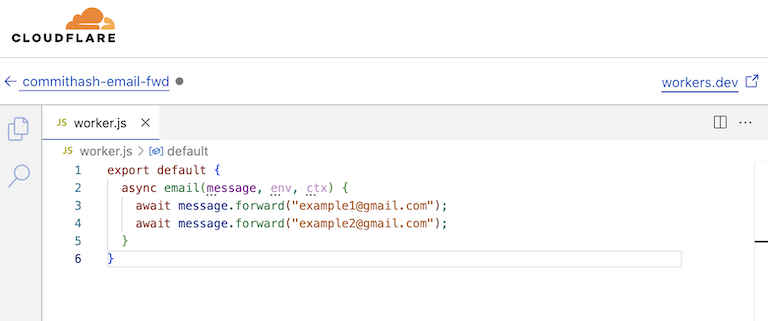
Edit the worker so it forwards to the addresses you set up in Destination Addresses earlier:
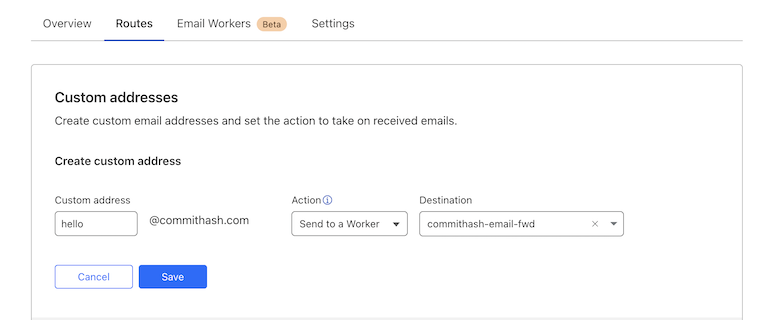
Finally go back to the Routes tab and add your Custom Address, using Action -> Send to Worker, and the Destination -> Name of the worker you just created:
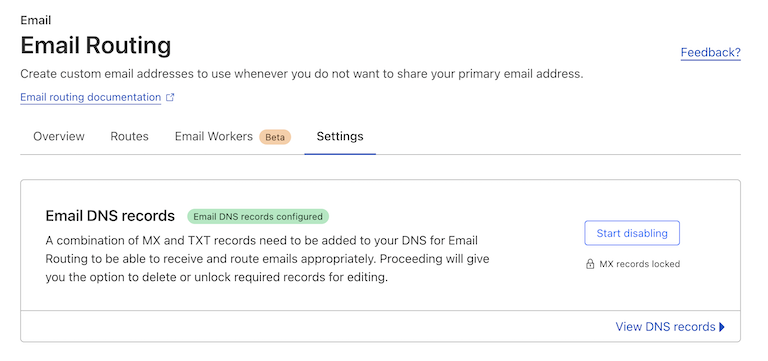
You should get a prompt to allow Cloudflare to set up DNS records for you. Go ahead and accept. Once this is done, the Settings tab should have a nice green bubble indicating that “Email DNS records configured”.
At this point it’s all set up. Any mail coming to your new email address should come to all the destinations you specified.
The limitations of this service are listed here, just fyi.
So no messages over 25mb and no more than 200 addresses at the time I’m writing this. Totally fine for my uses.
Also, just a heads up, if you look at the activity log in cloudflare of email being routed you’ll see them marked as “Dropped”. Seems to be a quirk of the system and totally expected. I’d prefer they be given a status named “Handled” or some such, but these “Dropped” emails are actually being forwarded, so no reason to freak out. More detail on that here.
Also, this guide just covered receiving email from your new domain name’s address. If you need to send email as that address from your gmail account, this post is very helpful.
Anyway, I’ve been running this setup for while now and it’s been great. I hope this helps others out there.